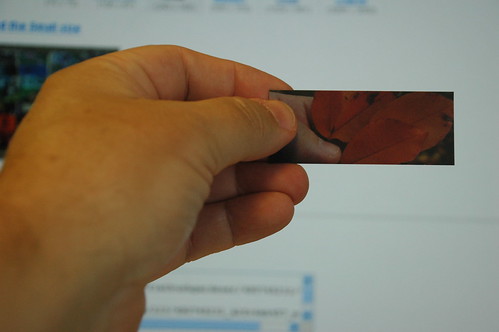
My left hand holding a Moo Minicard with a photo of my left hand holding a cluster of fallen leaves on Rugby Road.
I’ll be handing these little beauties out at tonight’s Brooklyn Blogfest. Each is printed with a crop of one of my Flickr photos on the obverse. The reverse has my name, blog and Flickr site addresses, and the date, time and title of the photo.
Disclosure: When I first tried to order these through the Moo site, there was a problem with the order. They apologized, attributing the problem to something to do with Flickr’s API. They gave me a coupon code for a free set of cards. Normally, they cost $25 (USD) including shipping/postage for 100 cards, or 25 cents per card.
Flickr has a link to Moo on their home page. This takes you right to the following steps to create the minicards.
Step 1: Choose photos from Flickr

For the past few months, I’ve been collecting sets of my photos by color. The Moo photo chooser lets you filter your Flickr photostream by set. This made it easy to select the best images for each color, and drag and drop them into the selection area.
There are 100 minicards in each set. The photos you select are are duplicated as needed to fill out 100 cards. I chose 50 images, so I got exactly 2 cards for each photo.
Step 2: Crop photos to fit the mini-card form factor

Here you select the crop for each image. You can set the crop vertically or horizontally, and drag it up and down or left-to-right to frame it best for the card.
In retrospect, the horizontal images work out best on the card. It’s more natural to hold the card horizontally, as I do in the photo at the top of the page, than vertically. This might influence my choices for images if I were to do this again.
Step 3: Personalize to include information about yourself and/or your photos

I figured I’d be able to personalize the cards with my name and contact info. What I didn’t expect was that I could include information about each photo on the reverse of each card. I chose to include the date and time the photo was taken, as well as the Flickr title of each photo.
Again, in retrospect, I should have made sure that each photo had a text title, instead of the default filename from the camera. The other thing I would change would be to drop the profile photo. It’s too small to be of much use, and it take sup too much room which could be used for longer lines of text.
I also forgot to include my email address in my info! That’s something I would correct the next time I do this.
The result

This shows 40 of the different images I selected. I selected 50 images altogether, 2 cards for each image. You can really see the rainbow effect here, as I intended.
Everyone to whom I’ve given a card has remarked on the quality and feel of the card-stock. They just feel good in the hand. They’re the same thickness as a business card, but they feel stiffer, both because they are smaller than business cards – about 40% of the area – and because the cards have a matte, plasticy-feeling finish to them.
I also spent some time playing around with the cards, arranging them in different combinations, to see how a rainbow photo banner might work. It could be very effective. I’ll need to select horizontal crops of my images which could work, and also work out what dimensions the banner should be. I’ll also need to play around with different fading or transparency, so that the blog title and other info will be readable against the background photos.
Yet another future project.

